Fractal Cloud Environment Initialization
Why do you need to initialize an environment?
Environment initialization in Fractal Cloud is the process that allows you to bridge Fractal Cloud control plane with your cloud environments through the installation of a Fractal Cloud Agent specialized for the cloud vendor you decide to use.
Our control plane uses temporary credentials and therefore it has no direct access to your cloud environments. The Agents instead analyze the drift between the declared infrastructure state, stored on the control plane, and the actual state of the cloud infrastructure instantiated, and continuously resolves it, if any.
One environment can have up to one agent per supported cloud vendor.
How to Initialize a Fractal Cloud Environment
You can initialize a Fractal Cloud Environment either through our Web UI or through our SDK
Prerequisites
Use the Web UI
AWS
- If your users' list is empty, the problem is related to a missing permission grant. You need to do these steps in your AWS account to fix the issue:
- Create the User:
- Go to IAM Identity Center > Users.
- Click Add user.
- Fill in Username, Email, First name, and Last name.
- Click Next and click Add user.
- Create the Permission Set:
- Go to Permission sets from the sidebar.
- Click Create permission set.
- Select Predefined permission set (default).
- Choose AdministratorAccess from the list.
- Click Next twice, then click Create.
- Assign User and Permission Set:
- Go to AWS accounts.
- Select the desired AWS Account.
- Click Assign users or groups.
- Select the User created in step 1 and click Next.
- Select the AdministratorAccess permission set created in step 2.
- Click Next, then Submit.
Microsoft Azure
-
In order to initialize the Azure Subscription correctly, ensure you have assigned the roles
ContributorandRole Based Access Control Administratoron the subscription selected. -
If you receive this error regarding
KeyVault:
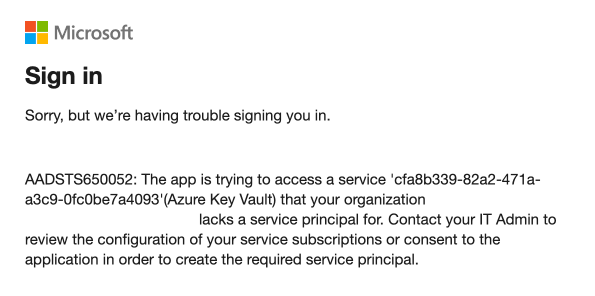
You have to enable it in one of these ways:
UI:
- Go to the Azure Portal, navigate to Subscriptions and select your specific subscription.
- In the left-hand menu, under Settings, select Resource providers.
- In the "Filter by name" box, type Microsoft.KeyVault.
- In the row Microsoft.KeyVault click the "..." button and select Register.
Azure CLI:
az provider register -n "Microsoft.KeyVault"
The status will require some seconds to change the registration status.
To initialize the Fractal Cloud Agent using the user interface follow the steps below:
1. Choose the Environment
Ensure you have an environment where you want to initialize the Fractal Cloud Agent. If you do not, follow the Quick Start guide.
2. Open the Configuration Panel Navigate to the configuration panel by selecting the Configure button on the Environments dashboard.
3. Navigate to Cloud Agents tab
Within the configuration panel, find and select the Cloud Agents tab. This will take you to a section where you can initialize Fractal Cloud agents.
4. Select a Cloud Provider
A list of cloud providers will be displayed, including Microsoft Azure, Amazon Web Services (AWS), Google Cloud Platform (GCP), Oracle Cloud Infrastructure (OCI) and Hetzner.
You can initialize environments for Microsoft Azure, Amazon Web Services (AWS) and Google Cloud Platform (GCP) directly from the Web UI. Ensure you have an active subscription and the necessary permissions for your selected provider.
Integration with Oracle Cloud Infrastructure (OCI) and Hetzner is currently available for enterprise customers only.
Select the Cloud Provider to initialize to proceed.
5. Initialize the Fractal Cloud Agent
Once the cloud provider is selected, click on the Initialize button to start the initialization process for the Fractal Cloud Agent.
Cloud Agents are essential components of Fractal Cloud's automated infrastructure deployment, deployed within your Cloud Infrastructure Landscape.
To disconnect your environment from Fractal Cloud, you can use the UI or SDK to remove the Environment, this will also remove all Fractal Cloud Agent resources within your Cloud Infrastructure Landscape.
Do not manually modify or delete any Fractal Cloud Agent resources.
6. Follow On-Screen Instructions
The UI will guide you through the necessary steps to complete the initialization. This may include authenticating with your cloud provider, selecting specific resources, or configuring settings specific to your environment.
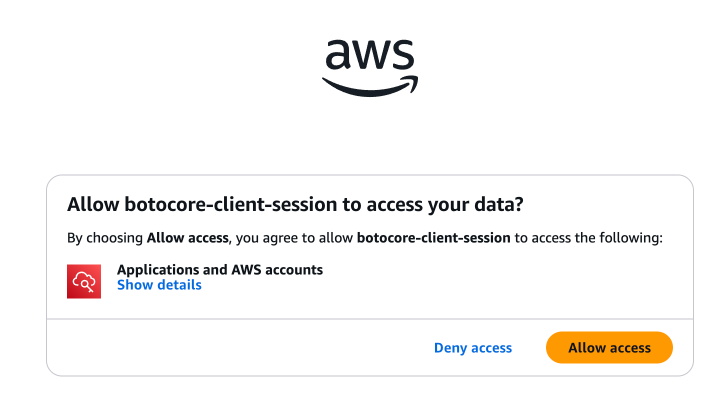
During the initialization of the Cloud Agent, we could use OAuth 2.0 Device Flow for authentication. This secure authentication method allows users to grant applications access to their cloud account without directly sharing login credentials.
Here's how it works:
- You will be provided with a device code.
- You'll be asked to visit a specific URL on a web browser.
- Once there, you will enter the provided device code to authenticate the application.
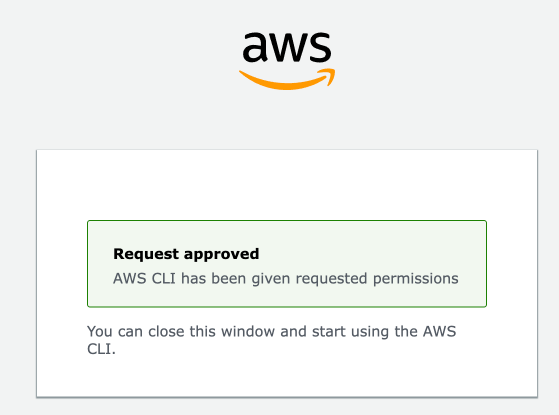
- After successful authentication, the Fractal Cloud setup will proceed, creating necessary resources on your behalf.
This process ensures that the Fractal Cloud Agent has the permissions it needs to operate within your cloud environment securely and efficiently.
Use the SDK
You can also initialize environments programmatically using the Fractal SDK, for example as part of your CI/CD pipelines. The SDK supports the same cloud providers available in the Web UI.
Use the SDK to initialize the Fractal Cloud Agent programmatically, typically as part of a CI/CD pipeline. Supported cloud providers are:
- Microsoft Azure
- Amazon Web Services (AWS)
- Google Cloud Platform (GCP)
1. Create a Fractal Resource Group
Ensure you have a Fractal Resource Group you can use for your new Environments. If you do not, follow the Quick Start guide to create one.
2. Initialize for Your Cloud Provider The SDK automatically creates the Cloud Agent and related resources during initialization.
AWS Initialization
- The SDK checks if the environment exists in Fractal Cloud.
- If not, it creates the environment and all required Cloud Agent resources.
AWS Credentials
- Log in with your SSO profile: authenticate via the standard SSO process to get initial, temporary credentials for your user.
aws configure sso
# It should output something like the following:
# SSO session name (Recommended): <YOUR_SSO_SESSION_NAME>
# SSO start URL [None]: <YOUR_SSO_START_URL>
# SSO region [None]: <YOUR_SSO_REGION>
# SSO registration scopes [sso:account:access]:
# Attempting to automatically open the SSO authorization page in your default browser.
# If the browser does not open, open the following URL:
# https://...
# There are some AWS accounts available to you.
# Using the account ID <YOUR_ACCOUNT_ID>
# The only role available to you is: <YOUR_ROLE_NAME>
# Using the role name "<YOUR_ROLE_NAME>"
# Default client Region [None]: <YOUR_SSO_REGION>
# CLI default output format (json if not specified) [None]:
# Profile name [<YOUR_ROLE_NAME>-<YOUR_ACCOUNT_ID>]:
# To use this profile, specify the profile name using --profile, as shown:
# aws sts get-caller-identity --profile <YOUR_ROLE_NAME>-<YOUR_ACCOUNT_ID>
aws sso login --profile <YOUR_SSO_PROFILE>
# It should output something like the following:
# Attempting to automatically open the SSO authorization page in your default browser.
# If the browser does not open, open the following URL:
# https://...
# Successfully logged into Start URL: <YOUR_SSO_START_URL>
- Get the current caller's ARN. Identify the unique Amazon Resource Name (ARN) of the role you are currently using. This is necessary to create a trust relationship.
aws sts get-caller-identity --profile <YOUR_SSO_PROFILE> --query Arn --output text
# <YOUR_CALLER_ARN>
- Create the Trust Policy JSON: define a JSON file that explicitly allows the ARN from the previous step (and only that ARN) to assume the new role you are about to create.
cat > trust-policy.json << EOF
{
  "Version": "2012-10-17",
  "Statement": [
    {
      "Effect": "Allow",
      "Principal": {
        "AWS": "<YOUR_CALLER_ARN>"
      },
      "Action": "sts:AssumeRole"
    }
  ]
}
EOF
- Create the new IAM Role and Attach the Policy: execute the create-role command using the trust policy and then attach the AdministratorAccess policy to grant the new role its permissions.
aws iam create-role --role-name fractal-cloud-initializer --assume-role-policy-document file://trust-policy.json --profile <YOUR_SSO_PROFILE>
aws iam attach-role-policy --role-name fractal-cloud-initializer --policy-arn arn:aws:iam::aws:policy/AdministratorAccess --profile <YOUR_SSO_PROFILE>
- Assume the New Role: use the sts:AssumeRole command to trade your initial credentials for a new set of temporary credentials belonging to the fractal-cloud-initializer role.
aws sts assume-role --role-arn arn:aws:iam::<YOUR_ACCOUNT_ID>:role/fractal-cloud-initializer --role-session-name <YOUR_SSO_SESSION_NAME> --profile <YOUR_SSO_PROFILE>
# It should output something like the following:
# {
#    "Credentials": {
#        "AccessKeyId": "<YOUR_ACCESS_KEY_ID>",
#        "SecretAccessKey": "<YOUR_SECRET_ACCESS_KEY>",
#        "SessionToken": "<YOUR_SESSION_TOKEN>",
#        "Expiration": "<YOUR_EXPIRATION_TIMESTAMP>"
#    },
#    "AssumedRoleUser": {
#        "AssumedRoleId": "<YOUR_ASSUMED_ROLE_ID>",
#        "Arn": "<YOUR_ASSUMED_ROLE_ARN>"
#    }
#}
Now you can use the temporary credentials to initialize the environment.
Microsoft Azure Initialization
- The SDK checks if the environment exists in Fractal Cloud.
- If not, it creates the environment and all required Cloud Agent resources.
Your program must impersonate an Azure Service Principal with the following permissions:
# Create a new service principal if needed (usually done only once)
az ad sp create-for-rbac --name "Fractal Cloud Initializer"

# Grant the "Contributor" and "Role Based Access Control Administrator" roles on each Azure subscription where the Fractal Cloud Agent requires access
az role assignment create --assignee <SERVICE_PRINCIPAL_ID> --role "Contributor" --scope /subscriptions/<SUBSCRIPTION_ID>
az role assignment create --assignee <SERVICE_PRINCIPAL_ID> --role "Role Based Access Control Administrator" --scope /subscriptions/<SUBSCRIPTION_ID>
In order to ensure all is good, ensure you have the expected roles and permissions assigned to the service principal using the following commands:
az ad app permission list --id <SERVICE_PRINCIPAL_ID>
# It should output something like the following:
#[
#  {
#    ...
#    "roleDefinitionName": "Contributor",
#    "scope": "/subscriptions/<SUBSCRIPTION_ID>",
#    ...
#  },
#  {
#    ...
#    "roleDefinitionName": "Role Based Access Control Administrator",
#    "scope": "/subscriptions/6c70be66-eee1-4ef3-a2cd-0878d504653f",
#    ...
#  }
#]
Optional: MS Graph Permissions Required When Using APP_ROLE_ASSIGNMENT
Some components—such as AzureWebApp or any other Azure-based component that supports role assignments—allow you to add roles using the SDK:
withRole(CustomWorkloadRole role)
withRoles(List<CustomWorkloadRole> roles)
Among the supported role types is:
RoleType.APP_ROLE_ASSIGNMENT
This role type requires Azure Active Directory App Role assignment capabilities.
Since these Microsoft Graph permissions are not assigned automatically during Cloud Agent initialization, you must configure them manually if (and only if) your component uses APP_ROLE_ASSIGNMENT.
You only need to follow this section if your component uses App Role Assignments via:
RoleType.APP_ROLE_ASSIGNMENT, or- any
CustomWorkloadRolethat requires assigning MS Graph App Roles.
If your components use only Azure built-in roles or standard Azure RBAC roles, you can safely ignore this section.
Required Microsoft Graph Permissions
To enable components to be deployed with App Role Assignments, you must grant the following Microsoft Graph Application permissions to the Fractal Cloud Agent's managed identity:
Managed Identity: id-fractal-cloud-agent
| Permission Name | Permission ID | Purpose |
|---|---|---|
AppRoleAssignment.ReadWrite.All | 9a5d68dd-52b0-4cc2-bd40-abcf44ac3a30 | Allows the agent to assign and remove App Roles |
Directory.ReadWrite.All | 06b708a9-e830-4db3-a914-8e69da51d44f | Required for modifying directory objects involved in role assignments |
Step 1 - Add the Permissions to the Managed Identity
Replace <MANAGED_IDENTITY_OBJECT_ID> with the object ID of the identity:
az ad app permission add \
--id <MANAGED_IDENTITY_OBJECT_ID> \
--api 00000003-0000-0000-c000-000000000000 \
--api-permissions 9a5d68dd-52b0-4cc2-bd40-abcf44ac3a30=Role

az ad app permission add \
--id <MANAGED_IDENTITY_OBJECT_ID> \
--api 00000003-0000-0000-c000-000000000000 \
--api-permissions 06b708a9-e830-4db3-a914-8e69da51d44f=Role
Step 2 - Grant Admin Consent
A Global Administrator or Privileged Role Administrator must approve these permissions.
Follow Microsoft’s guidance:
https://learn.microsoft.com/en-us/entra/identity/enterprise-apps/grant-admin-consent
Step 3 - Verify Permission Assignment
az ad app permission list --id <MANAGED_IDENTITY_OBJECT_ID>
You should see:
AppRoleAssignment.ReadWrite.AllDirectory.ReadWrite.All
| Use Case | Requires Manual MS Graph Setup? |
|---|---|
| Standard Azure environment initialization | ❌ No |
| Components using Azure built-in RBAC roles | ❌ No |
| Components using custom Azure RBAC roles | ❌ No |
Components using RoleType.APP_ROLE_ASSIGNMENT | ✅ Yes |
Google Cloud Platform (GCP) Initialization
You can initialize a GCP environment either through the Web UI or programmatically via the SDK. When using the SDK, it performs the following steps:
- Checks if the environment exists in Fractal Cloud.
- Creates the environment and required Cloud Agent resources if it does not exist.
Create the GCP Service Account
Use the following commands to create the service account and assign the necessary roles:
PROJECT_ID="your-project-id"
# Create the service account
gcloud iam service-accounts create fractal-cloud-initializer \
  --display-name "Fractal Cloud Initializer" \
  --project "$PROJECT_ID"

# Assign required roles to the service account
SERVICE_ACCOUNT="fractal-cloud-initializer@${PROJECT_ID}.iam.gserviceaccount.com"

gcloud projects add-iam-policy-binding "$PROJECT_ID" \
  --member "serviceAccount:$SERVICE_ACCOUNT" \
  --role roles/editor \
  --project "$PROJECT_ID"

gcloud projects add-iam-policy-binding "$PROJECT_ID" \
  --member "serviceAccount:$SERVICE_ACCOUNT" \
  --role roles/compute.networkAdmin \
  --project "$PROJECT_ID"

gcloud projects add-iam-policy-binding "$PROJECT_ID" \
  --member "serviceAccount:$SERVICE_ACCOUNT" \
  --role roles/serviceusage.serviceUsageAdmin \
  --project "$PROJECT_ID"

gcloud projects add-iam-policy-binding "$PROJECT_ID" \
  --member "serviceAccount:$SERVICE_ACCOUNT" \
  --role roles/resourcemanager.projectIamAdmin \
  --project "$PROJECT_ID"

gcloud projects add-iam-policy-binding "$PROJECT_ID" \
  --member "serviceAccount:$SERVICE_ACCOUNT" \
  --role roles/secretmanager.admin \
  --project "$PROJECT_ID"

gcloud projects add-iam-policy-binding "$PROJECT_ID" \
  --member "serviceAccount:$SERVICE_ACCOUNT" \
  --role roles/run.admin \
  --project "$PROJECT_ID"

# Create a JSON key file
gcloud iam service-accounts keys create fractal-cloud-initializer-key.json \
  --iam-account="$SERVICE_ACCOUNT" \
  --project "$PROJECT_ID"
Make sure the Service Usage API is enabled for your project. The initialization process will automatically enable additional required APIs.
gcloud services enable serviceusage.googleapis.com --project "$PROJECT_ID"
Required Environment Variables:
Set the following environment variables to allow the SDK to authenticate with your GCP service account:
| Variable | Description |
|---|---|
GCP_SERVICE_ACCOUNT_EMAIL | Email of the GCP service account ($SERVICE_ACCOUNT) |
GCP_SERVICE_ACCOUNT_CREDENTIALS | Base64-encoded service account key JSON |
The Fractal SDK requires the service account key to be provided as a base64-encoded JSON string.
To generate and print the base64-encoded key:
cat fractal-cloud-initializer-key.json | base64
3. Initialize the Environment programmatically
Cloud Agents are essential components of Fractal Cloud's automated infrastructure deployment, deployed within your Cloud Infrastructure Landscape. To disconnect your environment from Fractal Cloud, you can use the UI or SDK to remove the Environment, this will also remove all Fractal Cloud Agent resources within your Cloud Infrastructure Landscape.
Do not manually modify any resources within the rg-fractal Resource Group.
Follow the sample on how to use our SDK to initialize your new Environment.
Ensure that Admin Consent is granted for MS Graph roles after assigning them by following this guide.